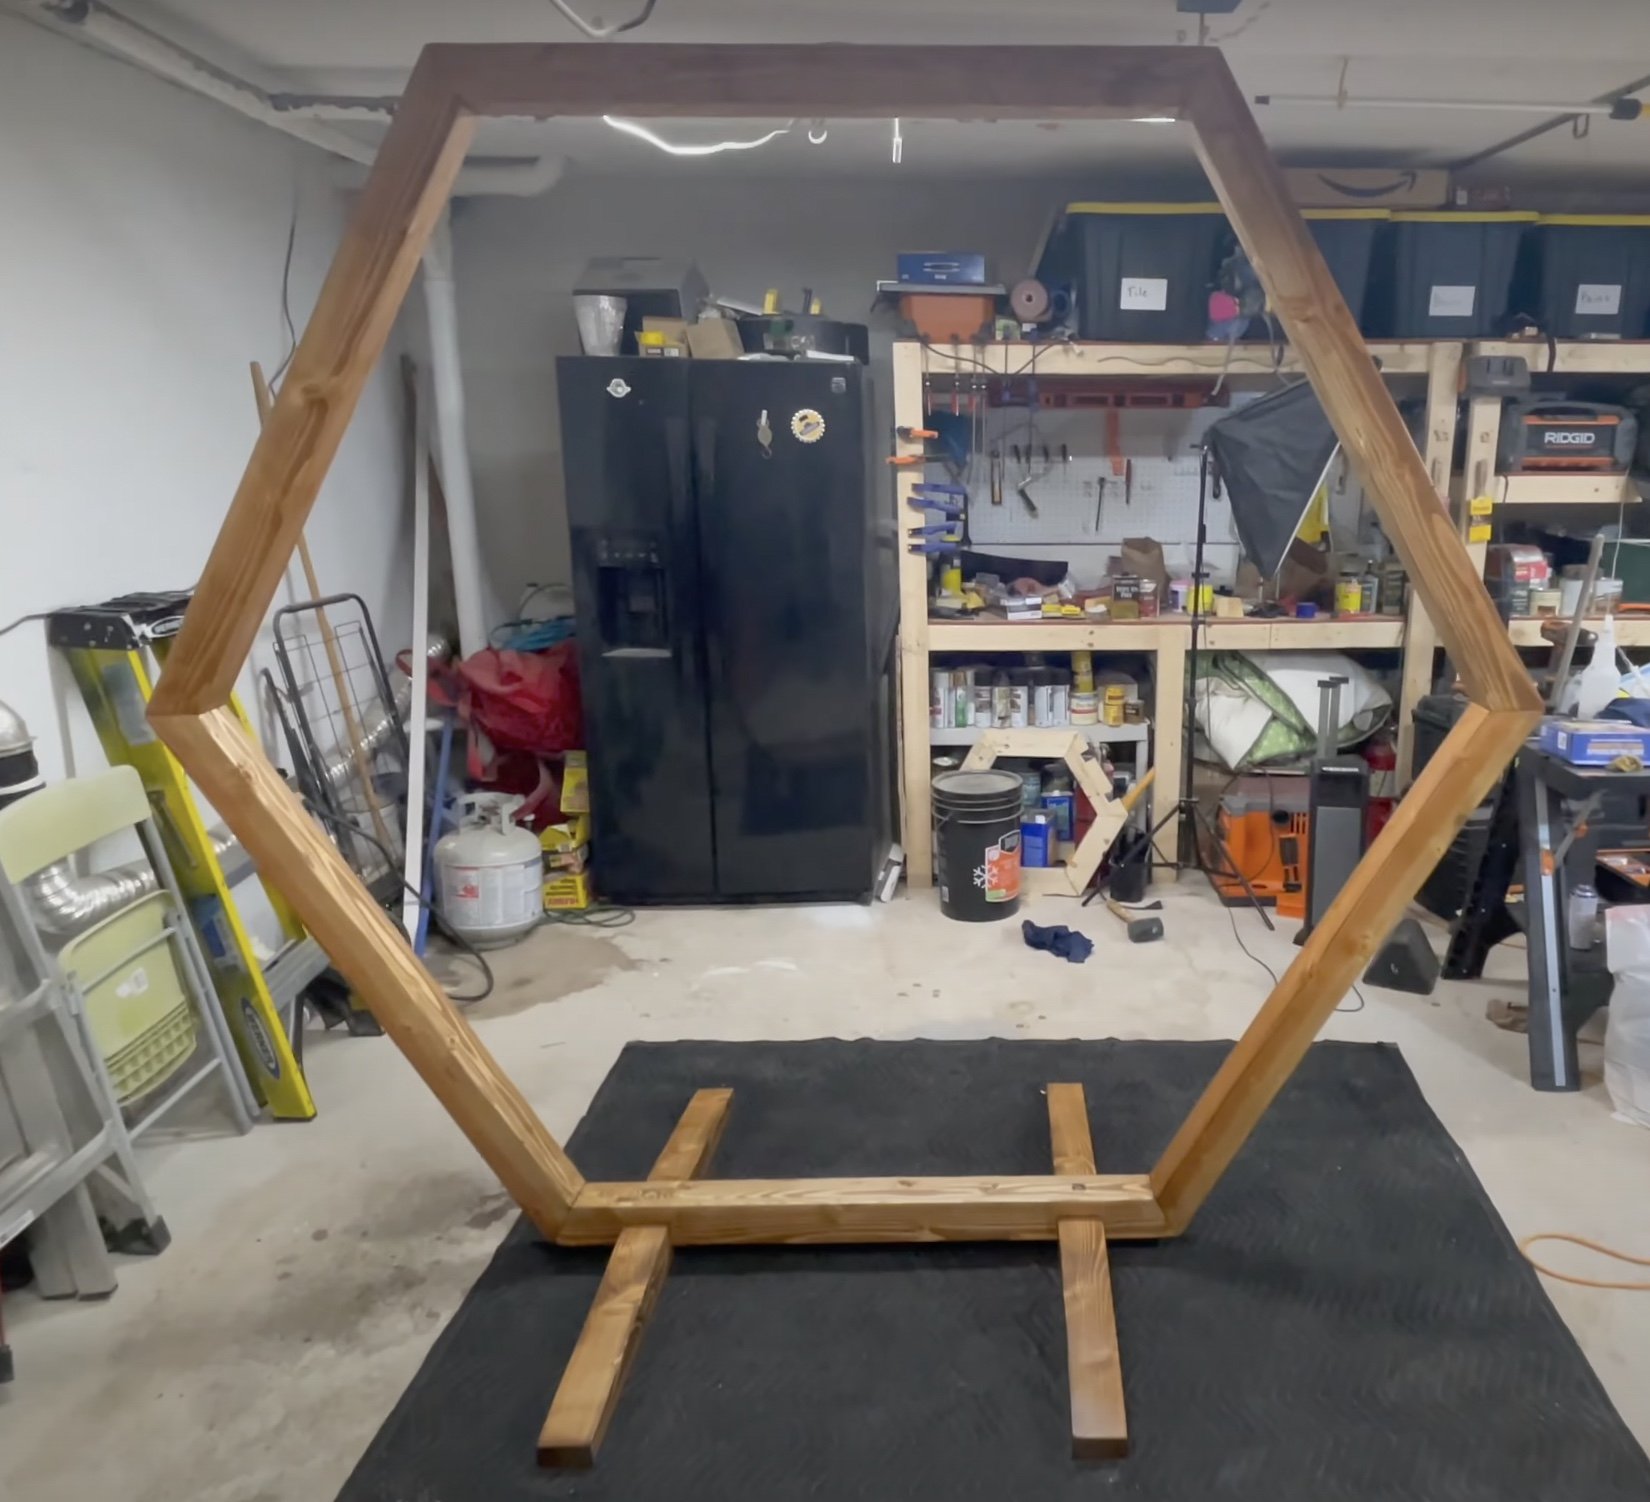
How I Failed at building a Hexagon Wedding Arch Again! Part 2
So the title might be a little misleading. I didn’t actually fail this time around. In Fact, I knocked it right out of the park. Sparing you the cut process, I link to part 1 for those. They are exactly the same.
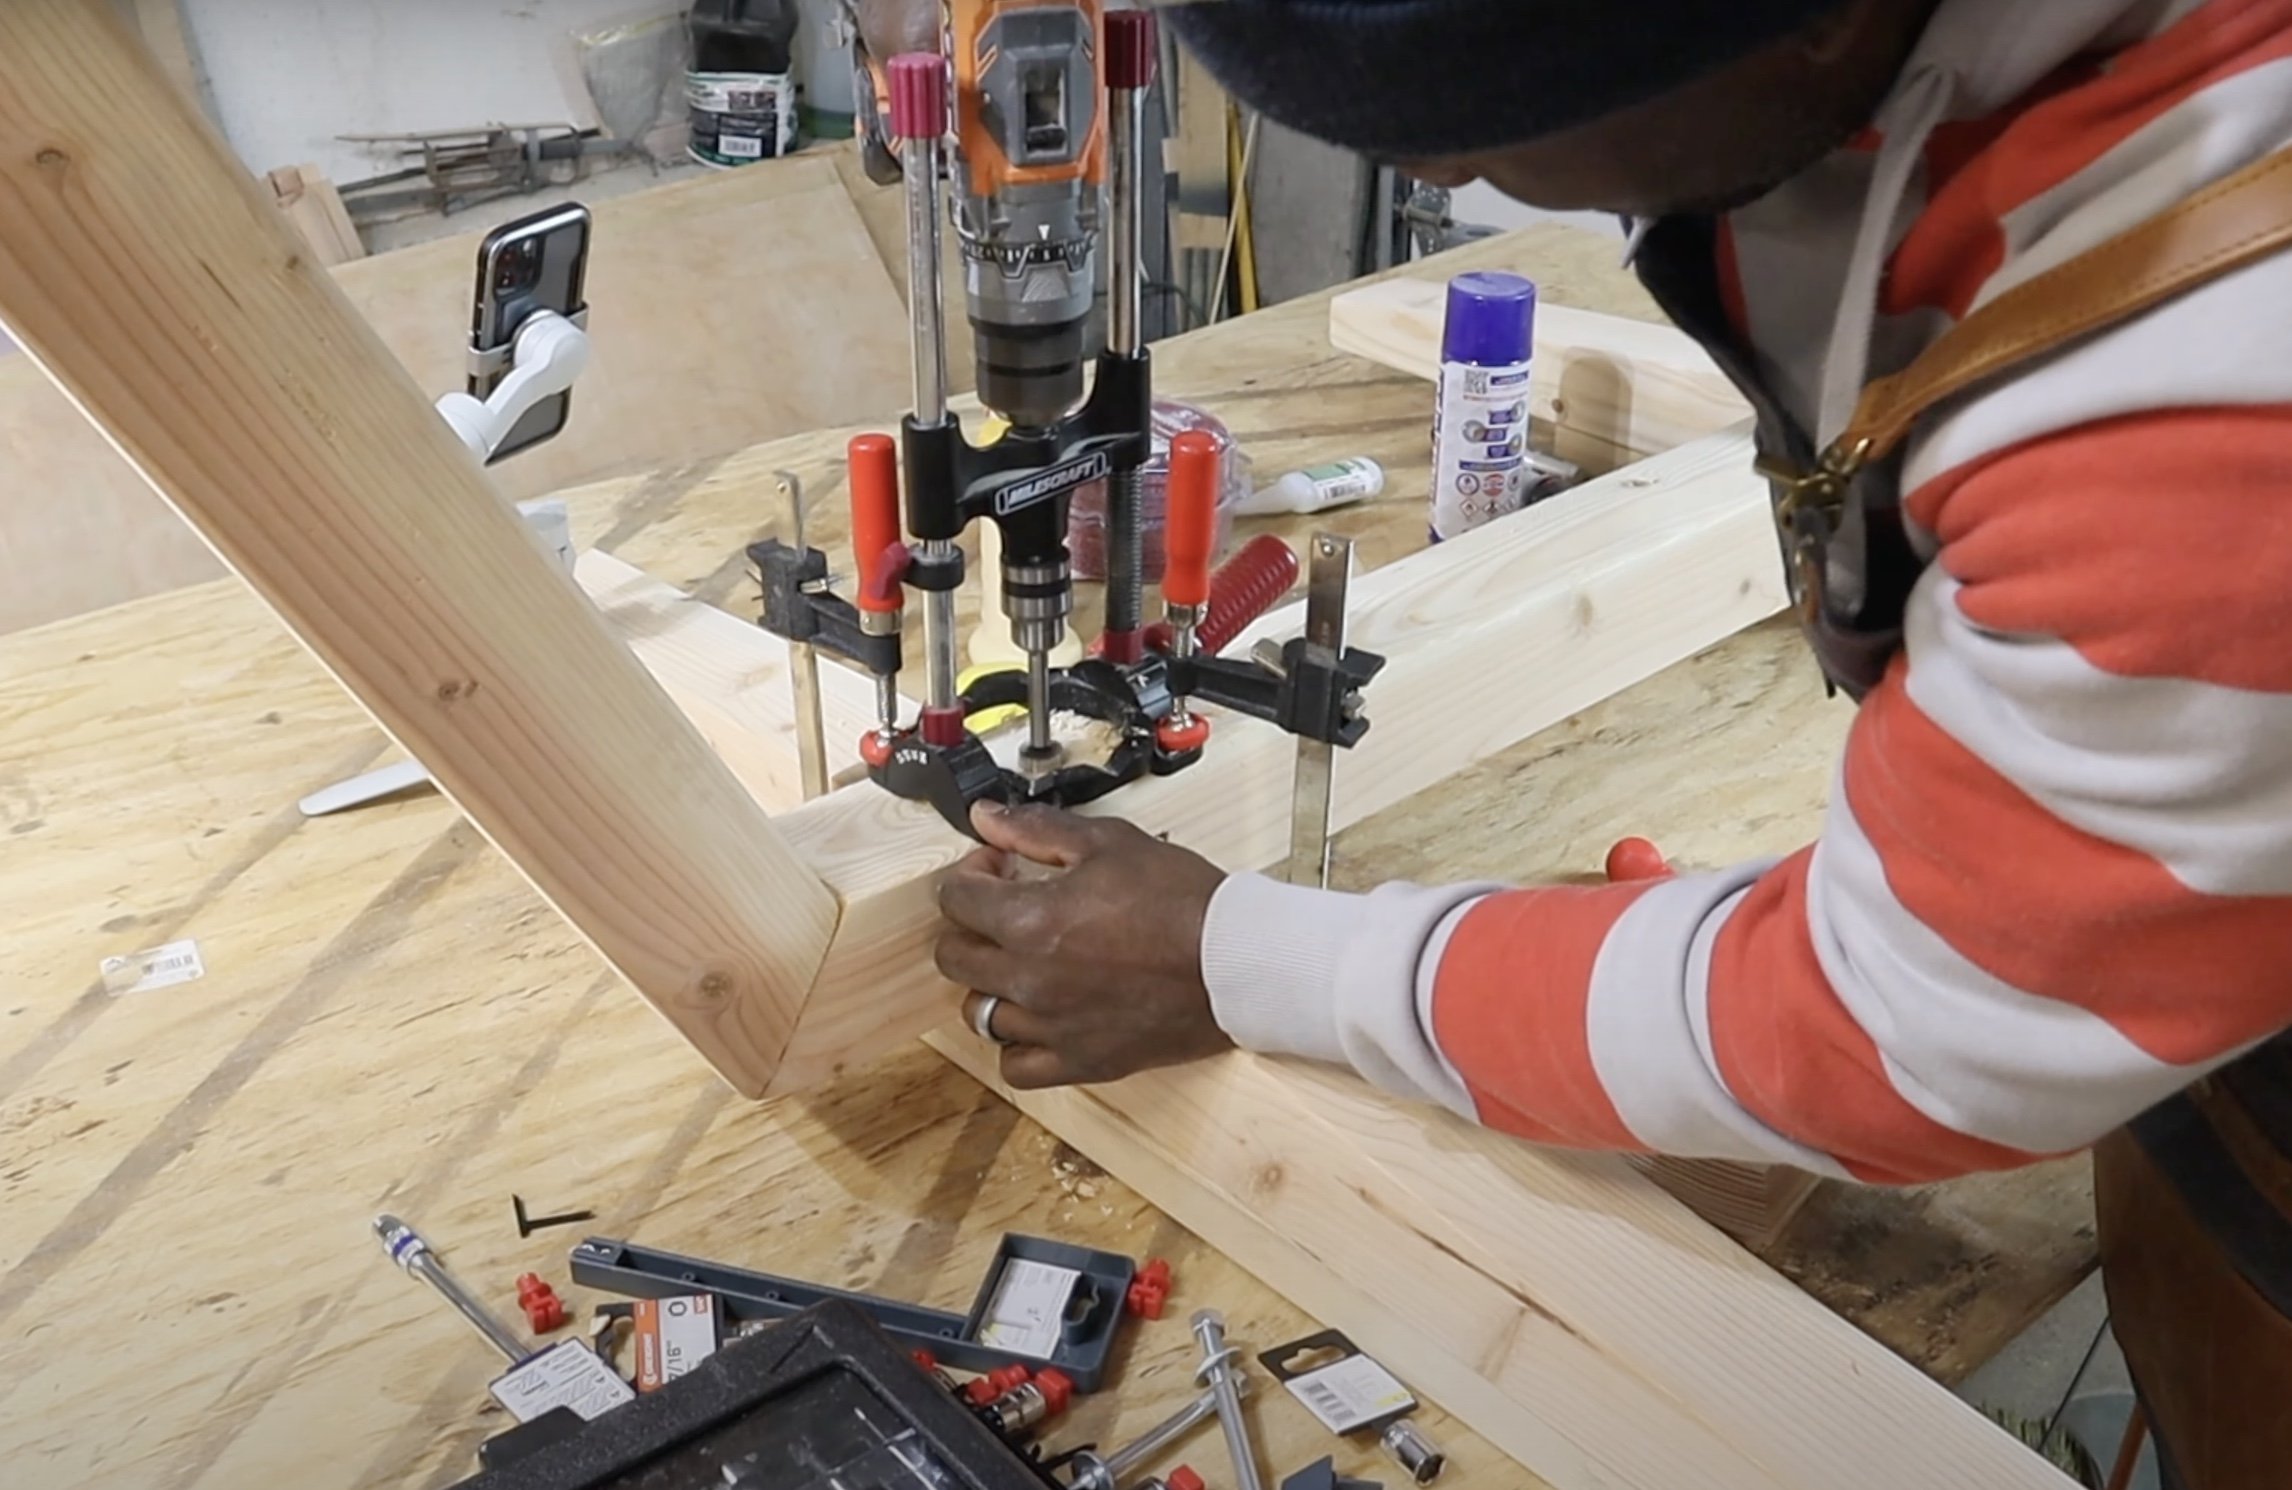
In this iteration, I decided to use wooden dowels to connect my Hexagon. Two for each joint to be exact.

Next, I bought them over to sander to remove material. It’s important to give the glue a place to fill. if your dowel is too snug, it most likely will swell too much and present fitment issues later on.
I unboxed my thickness planer and started to remove the excess material. This part is completely optional, but i was beginning i to get annoyed with the varying thicknesses of the construction grade 4x4’s. This is to be expected as they are rarely ever the same size. If you don’t have a thick news planer, you can shave them down on your table saw or spend some time sanding away the extra thickness.

I next made jig out of a scrap 2x4 and a piece of poplar I had laying around. This isn’t rocket science, but given the the 4” dowels and the angle in which you drilling, I would say it is necessary if you want all of your pieces to connect without a great deal of finessing and belt sanding.

Spoiler alert! I worked like a charm. I was able to slide the dowels in, glue and screw 3 sides together forming two U boats.

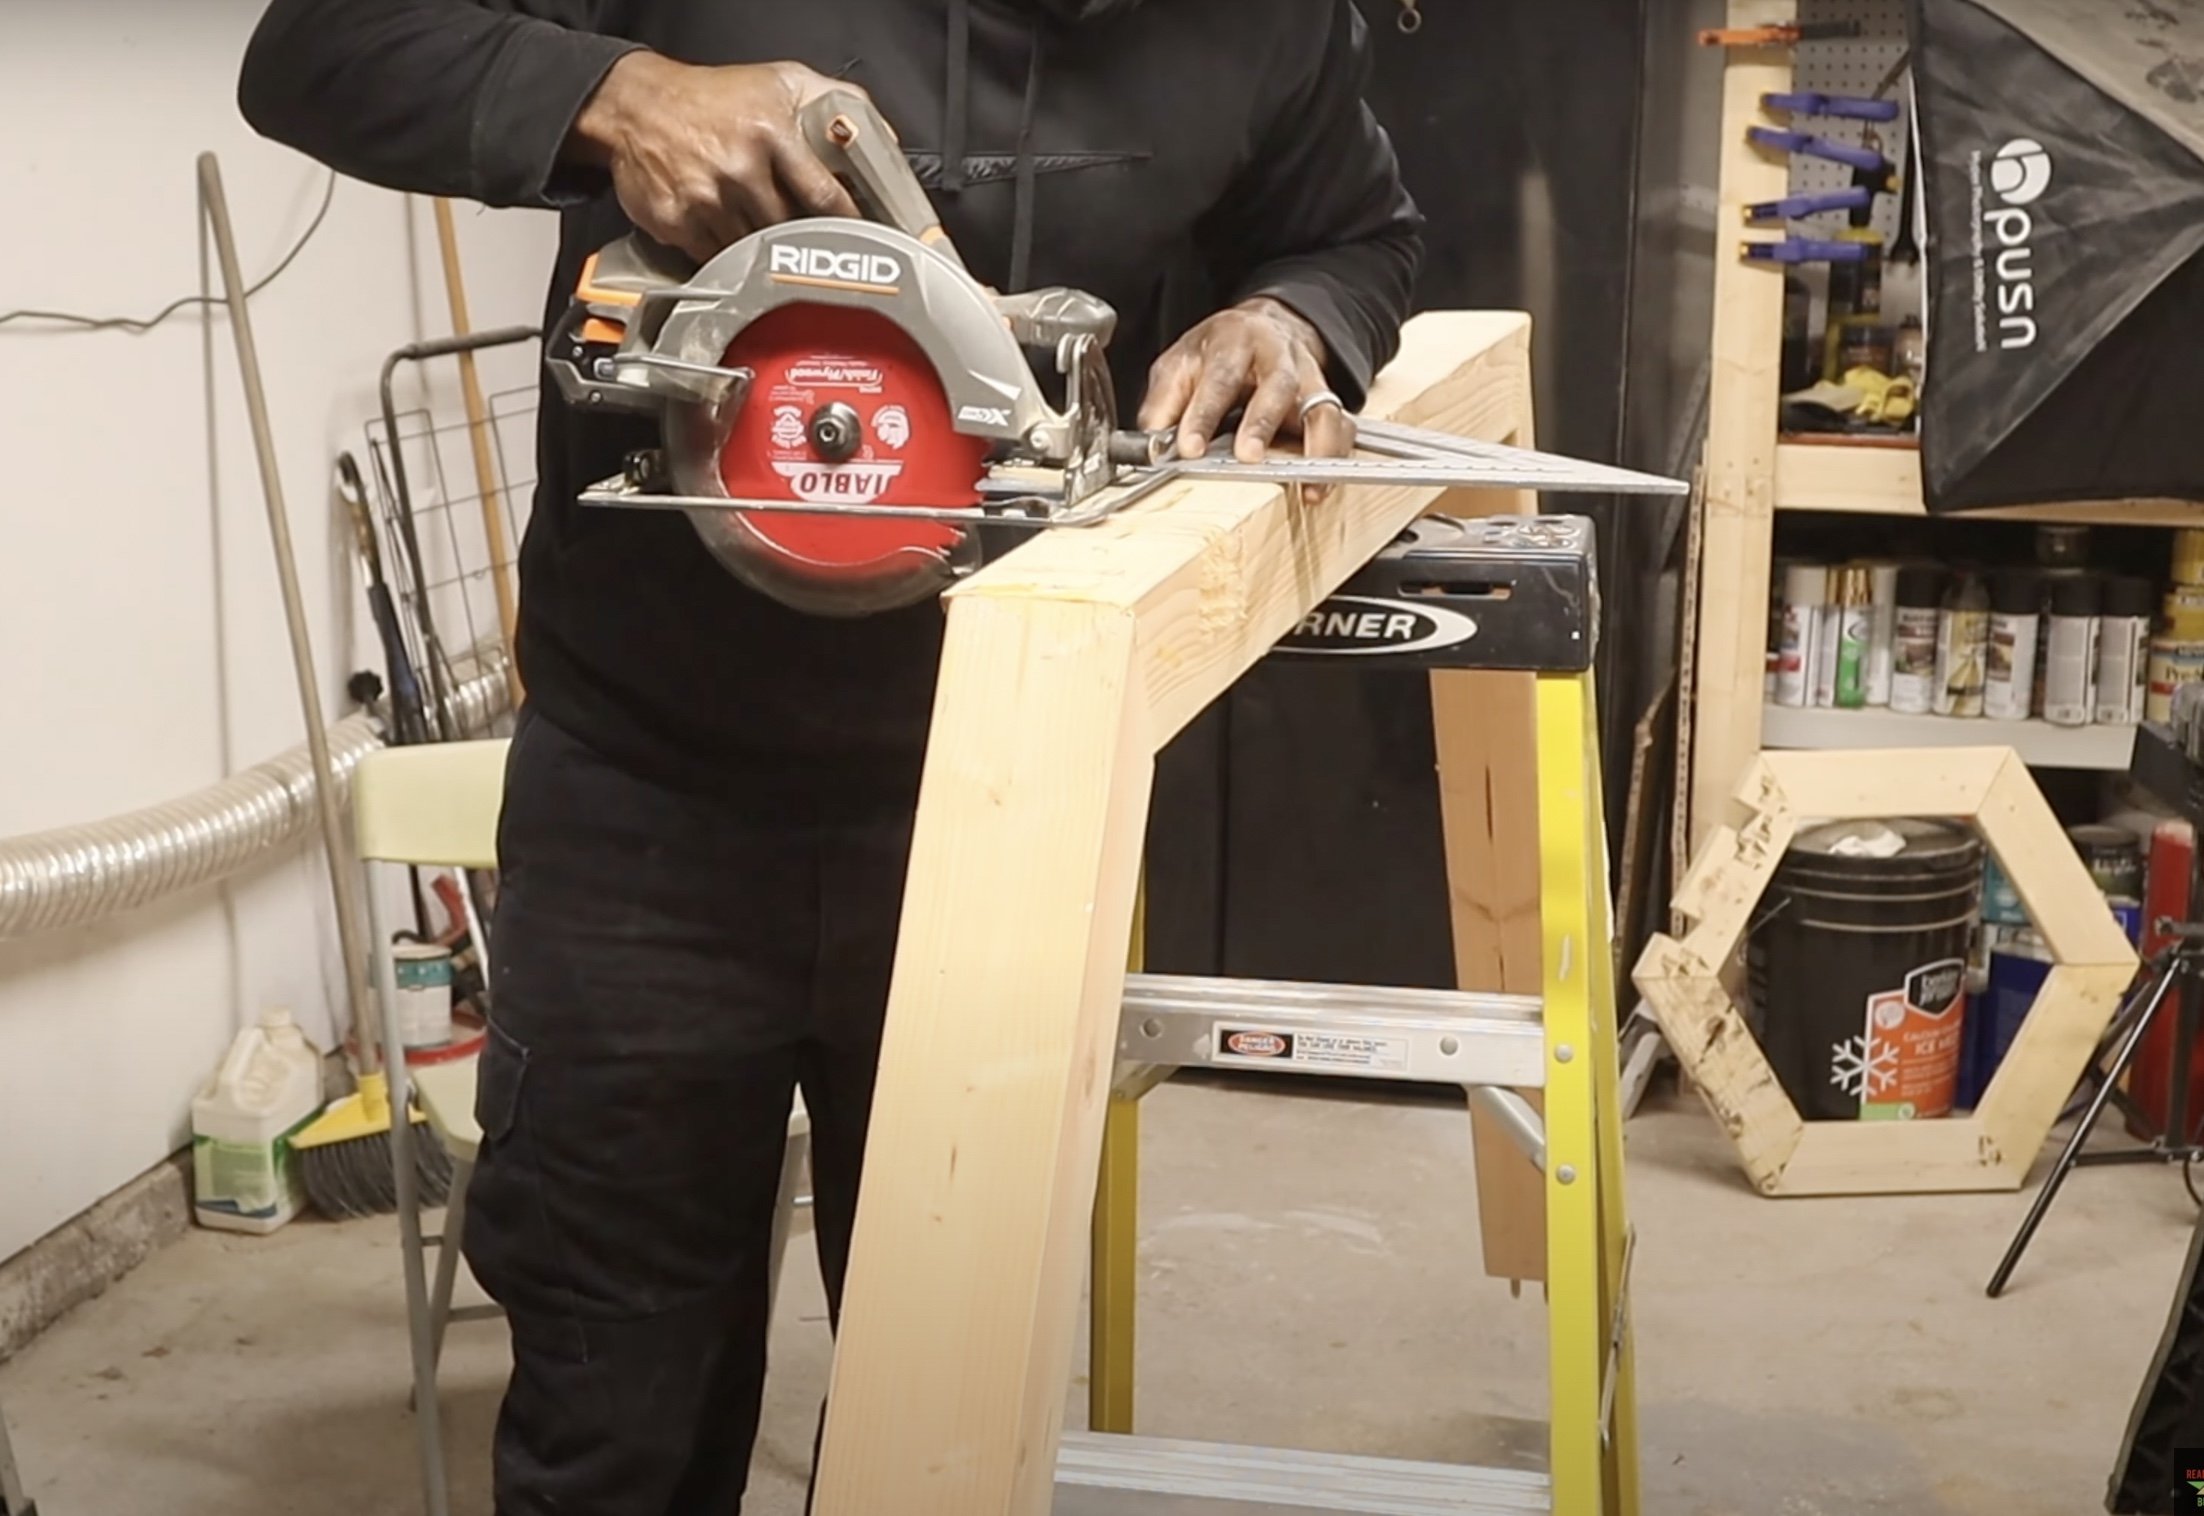
I let my U Boats dry over night. The next day I realized i had skipped a step. I did one of the most unsafe tasks i’ve ever tried. I needed to cut Half laps, but since I had glued and screwed all the pieces together, I had to get creative. I took out my later and circular saw and performed a balancing act while being a “safe” as possible. It did the trick, but if you can, try to remember to cut them before hand.
Now it was on to securing the arch to the base. I did this by permanently adding a nut to the underside of the bottom “U boat”. This will allow assembly to consist of one socket wrench from the topside.
Once everything was secure, I added my finish. Two coats of stain and 4 coats of wipe on polyurethane. I chose wipe on polyurethane because it was the easiest finish to apply on a vertical surface. After the finished dried, we were done. Plans are available for this build. Hexagon Build Plans